

Ach, Cake Pops! Diese kleinen, runden Dinger, die aussehen, als hätte ein Konditor seinen inneren Picasso entdeckt. Heute machen wir Cake Pops ohne dieses neumodische Cake-Pop-Maker-Zeug. Wir beweisen, dass man auch ohne fancy Gadgets kleine Kunstwerke erschaffen kann, die nicht nur gut aussehen, sondern auch noch himmlisch schmecken.
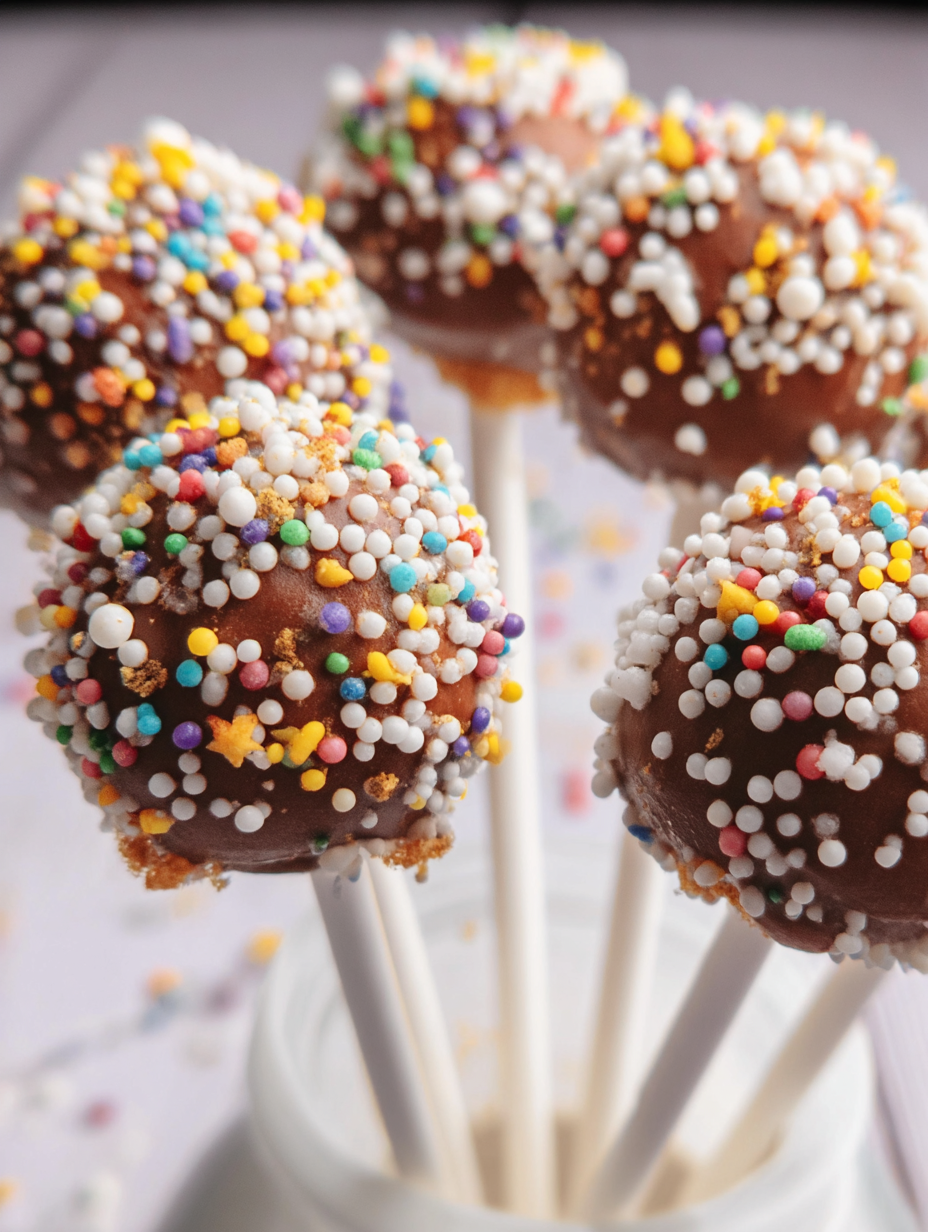
Stell dir vor: Saftiger Kuchen, umhüllt von knackiger Schokolade und verziert mit bunten Streuseln. Jeder Bissen ist eine Explosion von Süße und Freude, perfekt für Kindergeburtstage, Partys oder einfach, um sich selbst eine kleine Freude zu machen. Wir zaubern Cake Pops, die so lecker sind, dass sogar Omas neidisch werden!
Warum du diese Cake Pops ohne Cake-Pop-Maker lieben wirst:
- Die Zubereitung ist kinderleicht und macht sogar ohne spezielles Gerät Spaß, perfekt für einen entspannten Nachmittag mit der Familie.
- Die Kombination aus saftigem Kuchen und knackiger Schokolade ist ein Geschmackserlebnis, das einfach glücklich macht.
- Die bunten Verzierungen machen die Cake Pops zu einem echten Hingucker auf jeder Party oder als süße Geschenkidee.
- Du kannst die Cake Pops ganz nach deinem Geschmack variieren und mit verschiedenen Kuchen, Schokoladen und Streuseln experimentieren.
Ingredients for Cake Pops ohne Cake-Pop-Maker
Here’s what you’ll need to make this delicious dish:
The full ingredients list, including measurements, is provided in the recipe card directly below.
How to Make Cake Pops ohne Cake-Pop-Maker
Follow these simple steps to prepare this delicious dish:
Step 1: Kuchen vorbereiten
Zerbrösle den Kuchen in einer großen Schüssel, bis keine großen Stücke mehr vorhanden sind. Am besten geht das mit den Händen oder einer Gabel.
Step 2: Frischkäse hinzufügen
Gib den Frischkäse zu den Kuchenbröseln und verknete alles gut miteinander, bis eine homogene Masse entsteht. Die Masse sollte sich gut formen lassen und nicht zu klebrig sein.
Step 3: Cake Pops formen
Forme aus der Kuchenmasse kleine Kugeln. Die Größe kannst du selbst bestimmen, aber achte darauf, dass alle Cake Pops ungefähr gleich groß sind. Lege die Kugeln auf ein mit Backpapier belegtes Tablett und stelle sie für mindestens 30 Minuten in den Kühlschrank, damit sie fester werden.
Step 4: Schokolade schmelzen
Schmilz die Schokolade zusammen mit etwas Pflanzenöl in einem Wasserbad oder in der Mikrowelle. Rühre dabei regelmäßig um, damit die Schokolade nicht anbrennt.
Step 5: Cake Pops eintauchen
Nimm die Cake Pops aus dem Kühlschrank und spieße sie auf Cake-Pop-Stiele oder Zahnstocher. Tauche jeden Cake Pop in die geschmolzene Schokolade und drehe ihn, bis er vollständig mit Schokolade bedeckt ist. Lasse die überschüssige Schokolade abtropfen.
Step 6: Dekorieren und fest werden lassen
Verziere die Cake Pops sofort mit Streuseln oder anderen Dekorationen, solange die Schokolade noch feucht ist. Stelle die Cake Pops anschließend wieder in den Kühlschrank, bis die Schokolade vollständig fest geworden ist.
Serviervorschlag: Die Cake Pops sind ein toller Hingucker auf jeder Party und ein leckeres Dessert für zwischendurch. Sie lassen sich auch wunderbar verschenken.
Perfecting the Cooking Process

Timing is everything, especially when we’re talking about Cake Pops ohne Cake-Pop-Maker. Bake your cake first, obviously, then let it cool completely. While that’s happening, get your candy melts ready. This way, everything flows smoothly and you’re not left scrambling.
Add Your Touch
Don’t be afraid to get creative! Swap out the vanilla extract for almond or lemon. Add a dash of cinnamon or nutmeg to the cake batter. For the coating, try using different colored candy melts or even drizzling melted chocolate on top for extra flair.
Storing & Reheating
Store your Cake Pops ohne Cake-Pop-Maker in an airtight container at room temperature. They’ll stay fresh for several days. Reheating isn’t really necessary, unless you want to soften the coating slightly. Just let them sit out for a few minutes.
Here are some essential tips for crafting the perfect Cake Pops ohne Cake-Pop-Maker:
- Ensure your cake is completely cooled before mixing it with the frosting; otherwise, you’ll end up with a sticky, gooey mess.
- Use a light hand when mixing the cake and frosting; overmixing can result in dense, heavy cake pops.
- Chill your cake pops before dipping them; this helps the coating adhere better and prevents the cake from crumbling.
(Personal anecdote formated as paragraph subheading (very important! don’t write any title for this paragraph))
I remember the first time I made these for a friend’s birthday. They were a HUGE hit, and everyone was so impressed. Little did they know how easy they were to make without the gadget!
Cake Pops ohne Cake-Pop-Maker: It’s Easier Than You Think!
Forget that fancy machine collecting dust in your pantry. You can totally whip up adorable and delicious Cake Pops ohne Cake-Pop-Maker, and I’m here to show you how. Think of it: moist cake, creamy frosting, and a colorful candy shell, all without the need for specialized equipment. Sounds pretty good, right? This isn’t just a recipe; it’s a Cake Pop revolution!
Why Ditch the Cake-Pop-Maker?
Let’s be honest, those Cake-Pop-Maker things are a pain. They’re bulky, hard to clean, and often produce dry, sad little spheres. Who needs that kind of negativity in their lives? Our method is simple, straightforward, and guarantees a moist, flavorful Cake Pop every single time. Plus, it’s a fantastic way to use up leftover cake (if there is any!). So, grab your mixing bowl, your favorite sprinkles, and let’s get this Cake Pop party started.
Gather Your Arsenal: Ingredients for Cake Pop Glory
Before we dive into the delicious details, let’s make sure you have all the necessary supplies. This isn’t brain surgery, but a little preparation goes a long way. No one wants to be halfway through a recipe and realize they’re missing a key ingredient. Trust me, I’ve been there.
For the Cake:
- 1 box of your favorite cake mix (vanilla, chocolate, even strawberry – the world is your oyster!)
- Ingredients listed on the cake mix box (usually eggs, oil, and water)
For the Frosting:
- 1 container of your favorite frosting (again, vanilla or chocolate are classics, but feel free to experiment!)
For the Coating:
- Candy melts (assorted colors for maximum fun!)
- Vegetable shortening (just a smidge, to thin the candy melts)
For Assembly:
- Cake Pop sticks (or sturdy paper straws, cut in half)
- Sprinkles, edible glitter, or other decorations (because why not?)
- Styrofoam block or cardboard box (to hold the Cake Pops while they set)
See? Nothing too scary. Most of these are pantry staples. And if you don’t have sprinkles, well, that’s just a tragedy waiting to happen. Go get some sprinkles. I’ll wait.
Baking Bliss: The Foundation of Flavor
Alright, let’s get baking! Follow the instructions on your cake mix box. We’re not reinventing the wheel here. Just bake the cake according to the directions, in whatever pan you prefer (round, square, rectangular – it doesn’t matter).
Once the cake is baked, let it cool completely. This is crucial! A warm cake will turn into a sticky mess when you try to crumble it. I know, patience is hard, especially when cake is involved. But trust me, it’s worth the wait. Go watch an episode of your favorite show or do some yoga. Just resist the urge to attack the cake while it’s still hot.
The Crumble Zone: Turning Cake into Gold
Now comes the fun part: crumbling! Once the cake is completely cool, break it up into a large bowl. You can use your hands (my preferred method) or a fork. Just make sure there are no big chunks left. We want a nice, even crumbly texture.
Next, add the frosting. Start with a little bit at a time, mixing it into the cake crumbs until you get a consistency similar to playdough. You should be able to easily roll the mixture into balls without it being too sticky or too dry. This is where your inner artist comes out! Feel free to adjust the amount of frosting to achieve the perfect consistency. Remember, you can always add more, but you can’t take it away.
Rolling with the Homies: Shaping Your Cake Pop Dreams
Now comes the slightly tedious, but ultimately rewarding, task of rolling the cake mixture into balls. I like to use a small cookie scoop to ensure they’re all the same size, but you can also just eyeball it. Aim for about 1-inch balls.
Place the rolled cake balls on a baking sheet lined with parchment paper. Once you’ve rolled all the cake pops, pop them into the freezer for about 15-20 minutes. This will help them firm up and make them easier to dip. We’re not trying to freeze them solid, just give them a little chill.
Dipping and Dripping: The Art of the Coating
While the cake pops are chilling, melt your candy melts according to the package directions. I usually do this in the microwave, in 30-second intervals, stirring in between. Be careful not to overheat the candy melts, or they’ll seize up and become unusable.
Add a teaspoon or two of vegetable shortening to the melted candy melts to thin them out. This will make the dipping process smoother and prevent the coating from being too thick.
Remove the cake pops from the freezer. Dip the tip of a Cake Pop stick into the melted candy melts and insert it into the center of a cake ball. This will help the stick adhere to the cake pop.
Now, carefully dip each cake pop into the melted candy melts, making sure it’s completely coated. Gently tap off any excess coating.
Sprinkle Spectacular: The Finishing Touches
While the coating is still wet, sprinkle with your favorite decorations. Sprinkles, edible glitter, chopped nuts, crushed cookies – the possibilities are endless! Get creative and have fun with it. This is your chance to really personalize your Cake Pops.
Insert the Cake Pops into a styrofoam block or cardboard box to allow the coating to set completely. This usually takes about 30 minutes to an hour.
The Grand Finale: Enjoying Your Cake Pop Creations
And there you have it! Beautiful, delicious Cake Pops ohne Cake-Pop-Maker. Admire your handiwork, take some photos for Instagram (because if you don’t Instagram it, did it even happen?), and then devour them with glee.
These Cake Pops are perfect for parties, holidays, or just a fun afternoon treat. They’re also a great activity to do with kids. Just be prepared for a little mess. But hey, that’s part of the fun, right?
Cake Pops ohne Cake-Pop-Maker: Variations to Spice Things Up
Want to take your Cake Pops to the next level? Here are a few variations to try:
- Chocolate Cake Pops: Use chocolate cake mix and chocolate frosting. Dip in dark chocolate candy melts and sprinkle with cocoa powder.
- Lemon Cake Pops: Use lemon cake mix and vanilla frosting. Dip in yellow candy melts and sprinkle with lemon zest.
- Red Velvet Cake Pops: Use red velvet cake mix and cream cheese frosting. Dip in white candy melts and drizzle with red candy melts.
- Confetti Cake Pops: Add sprinkles to the cake batter for a festive twist. Dip in white candy melts and sprinkle with even more sprinkles!
The possibilities are truly endless. Don’t be afraid to experiment and create your own unique Cake Pop masterpieces.
Troubleshooting Your Cake Pop Adventures
Sometimes, things don’t go exactly as planned. Here are a few common Cake Pop problems and how to fix them:
- Cake Pops are falling off the sticks: Make sure the cake pops are chilled before dipping. Also, make sure the candy melts are not too thick.
- Coating is too thick: Add a little more vegetable shortening to the melted candy melts to thin them out.
- Coating is cracking: This can happen if the cake pops are too cold. Let them sit out for a few minutes before dipping.
- Cake Pops are too sticky: You’ve added too much frosting. Add more cake crumbs to balance it out.
Remember, practice makes perfect. Don’t get discouraged if your first batch isn’t perfect. Just keep trying, and you’ll be a Cake Pop pro in no time!
Essential Tools for Cake Pop Success
While you don’t need a Cake-Pop-Maker for this recipe, here are a few tools that can make the process easier:
- Small cookie scoop: For uniform cake pop size.
- Parchment paper: To prevent the cake pops from sticking to the baking sheet.
- Cake Pop sticks: Or sturdy paper straws.
- Styrofoam block or cardboard box: To hold the Cake Pops while they set.
- Microwave-safe bowls: For melting the candy melts.
- Spoons and spatulas: For mixing and dipping.
Having the right tools can make all the difference. But even if you don’t have all of these, you can still make amazing Cake Pops!
The Final Word: Cake Pops ohne Cake-Pop-Maker are a Win!
So, there you have it! Everything you need to know to make delicious Cake Pops ohne Cake-Pop-Maker. This recipe is simple, fun, and guaranteed to impress. So, ditch that dusty Cake-Pop-Maker and get ready to create some Cake Pop magic! Happy baking!
Perfecting the Cooking Process
Melting the candy melts requires patience and low heat. Don’t rush it, or you’ll end up with a clumpy mess. The best sequence is to prepare the cake pops first, then melt the candy while they chill.
Add Your Touch
Consider using different types of cake, like spice cake or carrot cake. You can also add chopped nuts, dried fruit, or chocolate chips to the cake batter for extra texture and flavor.
Storing & Reheating
Store the Cake Pops in an airtight container at room temperature. If you live in a warm climate, you may want to refrigerate them. Reheating isn’t recommended, as it can melt the coating.
Here are some essential tips for crafting the perfect Cake Pops ohne Cake-Pop-Maker:
- Using a double boiler for melting the candy melts provides a more consistent and gentle heat, which prevents burning or seizing.
- Dipping the Cake Pop stick into the melted coating before inserting it into the cake ball secures it more firmly for better handling.
- Gently swirling the dipped Cake Pop allows the excess coating to drip off, creating a smooth and even finish without thick spots.
(Personal anecdote formated as paragraph subheading (very important! don’t write any title for this paragraph))
My nephew once helped me decorate these, and his sprinkle application was…enthusiastic. We found sprinkles EVERYWHERE for weeks, but the Cake Pops looked amazing!
Conclusion for Cake Pops ohne Cake-Pop-Maker
Cake Pops ohne Cake-Pop-Maker sind einfacher zuzubereiten, als man denkt! Mit ein wenig Kreativität und den richtigen Tipps gelingen sie auch ohne spezielle Geräte. Ob mit den Händen geformt oder in Mini-Muffin-Formen gebacken, die Ergebnisse sind köstlich und sehen toll aus. Hauptsache, der Kuchen schmeckt und die Schokolade ist lecker. Lass deiner Fantasie freien Lauf und dekoriere die Cake Pops nach Herzenslust. So werden sie zum Highlight auf jeder Party oder einfach nur zum süßen Genuss zwischendurch.
Print
Cake Pops ohne Cake-Pop-Maker
Delicious cake pops ohne cake-pop-maker recipe with detailed instructions and nutritional information.
- Total Time: 35 minutes
- Yield: 4 servings
Ingredients
- Kuchenreste (Biskuit, Marmorkuchen, etc.) ca. 300g
- Frischkäse: 100g
- Puderzucker: 2-3 EL
- Schokolade (Zartbitter, Vollmilch oder Weiße): 200g
- Pflanzenöl (z.B. Sonnenblumenöl): 1 TL
- Cake Pop Stiele: 15-20 Stück
- Streusel, gehackte Nüsse, Kokosraspeln: Nach Belieben zur Dekoration
- Lebensmittelfarbe (optional): Nach Bedarf
Instructions
- Step 1: Kuchenreste in einer Schüssel fein zerbröseln. Am besten geht das mit den Händen oder einer Gabel. Es sollten keine großen Stücke mehr vorhanden sein.
- Step 2: Frischkäse und Puderzucker zu den Kuchenbröseln geben. Mit den Händen gut verkneten, bis eine formbare Masse entsteht. Wenn die Masse zu trocken ist, etwas mehr Frischkäse hinzufügen.
- Step 3: Aus der Kuchenmasse kleine Kugeln formen (ca. 2-3 cm Durchmesser). Die Kugeln auf ein mit Backpapier ausgelegtes Tablett legen und für mindestens 30 Minuten in den Kühlschrank stellen. Dadurch werden sie fester und lassen sich besser verarbeiten.
- Step 4: Schokolade grob hacken und über einem Wasserbad oder in der Mikrowelle schmelzen. Einen Teelöffel Pflanzenöl hinzufügen, damit die Schokolade flüssiger wird.
- Step 5: Einen Cake Pop Stiel ca. 1 cm tief in die geschmolzene Schokolade tunken und dann sofort in eine Kuchenkugel stecken. Mit den restlichen Kugeln wiederholen. Kurz antrocknen lassen.
- Step 6: Die Cake Pops in die geschmolzene Schokolade eintauchen oder mit einem Löffel überziehen. Überschüssige Schokolade abtropfen lassen. Sofort mit Streuseln, gehackten Nüssen oder Kokosraspeln dekorieren, solange die Schokolade noch feucht ist. Die Cake Pops aufrecht in ein Styroporblock oder einen Kuchenständer stecken, bis die Schokolade vollständig fest geworden ist.
Notes
- Gekühlte Cake Pops halten sich im Kühlschrank mehrere Tage frisch und saftig.
- Zum Servieren kurz vor dem Verzehr aus dem Kühlschrank nehmen, damit die Schokolade nicht schwitzt.
- Wenn die Schokolade zu dickflüssig wird, noch etwas Öl oder Kokosfett hinzufügen, um sie geschmeidiger zu machen.
- Für besonders saftige Cake Pops etwas Aprikosenmarmelade unter die Kuchenbrösel mischen!
- Prep Time: 15 minutes
- Cook Time: 20 minutes
- Method: Stovetop
- Cuisine: American
FAQs
Kann ich jeden Kuchen für Cake Pops ohne Cake-Pop-Maker verwenden?
Absolut! Im Grunde genommen ist jeder Kuchen geeignet, der nicht zu trocken ist. Schokoladenkuchen, Vanillekuchen, Marmorkuchen – erlaubt ist, was schmeckt! Wenn dein Kuchen etwas trocken geraten ist, kannst du einfach etwas mehr Frischkäse oder Buttercreme hinzufügen, um die gewünschte Konsistenz zu erreichen. Denk daran, dass der Kuchen die Basis bildet, also wähle deinen Favoriten. Experimentiere ruhig mit verschiedenen Geschmacksrichtungen und finde deine perfekte Kuchen-Pop-Grundlage. Hauptsache, es schmeckt! Cake Pops sind eine tolle Möglichkeit, Kuchenreste zu verwerten.
Welche Alternativen zum Cake-Pop-Maker gibt es wirklich?
Es gibt einige clevere Alternativen! Anstatt eines Cake-Pop-Makers kannst du einfach deine Hände benutzen, um kleine Kugeln zu formen. Backpapier und ein paar Stäbchen sind alles, was du brauchst. Du kannst die Kugeln auch auf eine Gabel legen und dann in Schokolade tauchen. Oder du verwendest eine Mini-Muffin-Form für eine gleichmäßigere Form. Es gibt keinen Grund, auf Cake Pops zu verzichten, nur weil du keinen Maker hast. Kreativität ist gefragt! Die Ergebnisse sind fast genauso gut und der Spaßfaktor ist mindestens genauso hoch.
Wie verhindere ich, dass die Cake Pops vom Stiel fallen?
Das ist ein häufiges Problem, aber keine Sorge, es gibt eine Lösung! Tauche die Spitze des Stiels zuerst in geschmolzene Schokolade und stecke ihn dann vorsichtig in die Kuchenkugel. Die Schokolade wirkt wie ein Kleber. Lasse die Schokolade kurz aushärten, bevor du den Cake Pop komplett in Schokolade tauchst. Stelle sicher, dass die Kuchenkugel nicht zu schwer ist. Zu viel Kuchenmasse macht den Cake Pop instabil. Ein kleiner Trick, der Wunder wirkt! So bleiben deine Cake Pops garantiert am Stiel.
Wie bewahre ich die Cake Pops ohne Cake-Pop-Maker am besten auf?
Am besten bewahrst du die Cake Pops im Kühlschrank auf, besonders wenn sie mit Frischkäse oder Buttercreme zubereitet wurden. Lege sie in eine luftdichte Dose, um sie vor dem Austrocknen zu schützen. Sie halten sich so etwa 3-4 Tage. Du kannst sie auch einfrieren! Wickle sie einzeln in Frischhaltefolie und lege sie dann in einen Gefrierbeutel. Im Gefrierschrank halten sie sich bis zu 2 Monate. Vor dem Servieren einfach auftauen lassen. So hast du immer einen leckeren Snack parat!


Leave a Comment