

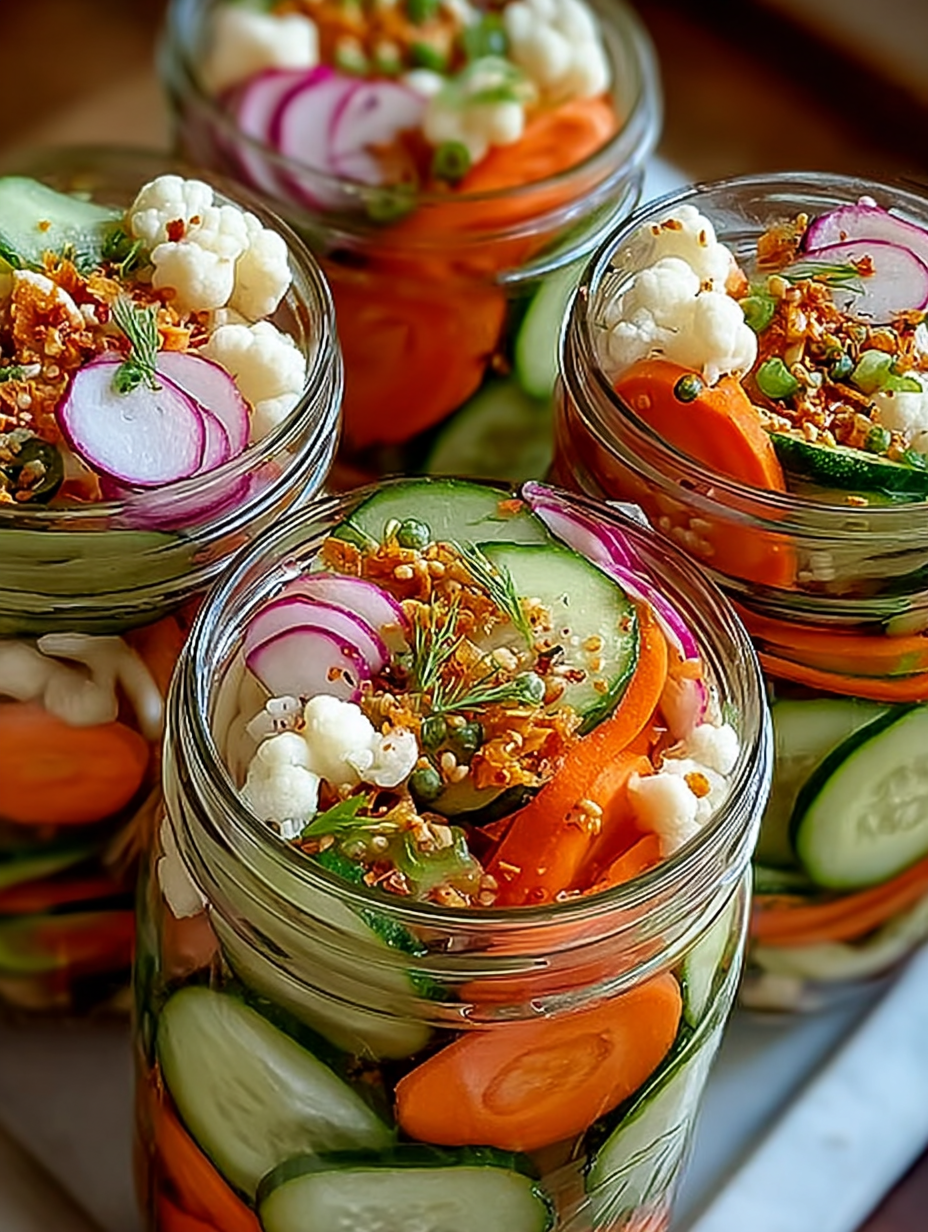
Einfach eingelegtes Gemüse aus dem Kühlschrank: Stell dir vor, wie eine Explosion von Farben und Aromen deinen Gaumen verwöhnt, eine Symphonie aus süßen, sauren und würzigen Noten, die dich sofort in ihren Bann zieht. Diese Köstlichkeit ist nicht nur ein Gaumenschmaus, sondern auch ein wahrer Augenschmaus, der jeden Teller verschönert.
Erinnere dich an unbeschwerte Sommertage, an denen du als Kind mit deiner Familie im Garten spieltest und deine Großmutter mit einem Lächeln im Gesicht eine Schüssel mit eingelegtem Gemüse hervorzauberte. Der Duft von frischem Dill und knackigem Gemüse weckte die Lebensgeister und versprach ein unvergessliches Geschmackserlebnis. Diese Erinnerungen sind wie ein warmer Sonnenstrahl, der dein Herz erwärmt und dich an die einfachen Freuden des Lebens erinnert.
Dieser einfache, aber unglaublich leckere Genuss zeichnet sich aus durch:
- Die unkomplizierte Zubereitung, die selbst Kochanfänger im Handumdrehen meistern können.
- Ein facettenreiches Geschmacksprofil, das von süßlich bis würzig alles bietet, was das Herz begehrt.
- Die farbenfrohe Optik, die jeden Tisch aufwertet und zum Anbeißen einlädt.
- Die vielseitige Verwendbarkeit als Beilage, Snack oder Zutat für Salate und Sandwiches.
Ingredients for Einfach eingelegtes Gemüse aus dem Kühlschrank
Here’s what you’ll need to make this delicious dish:
The full ingredients list, including measurements, is provided in the recipe card directly below.
How to Make Einfach eingelegtes Gemüse aus dem Kühlschrank
Follow these simple steps to prepare this delicious dish:
Step 1: Gemüse vorbereiten
Wasche das Gemüse gründlich und schneide es in mundgerechte Stücke. Gurken und Karotten in Scheiben schneiden, Paprika in Streifen und Zwiebeln in Ringe. Den Knoblauch schälen und fein hacken.
Step 2: Die Lake zubereiten
In einem Topf Essig, Zucker, Salz, Senfsaat, Pfefferkörner und Lorbeerblätter aufkochen. Rühre so lange, bis sich Zucker und Salz vollständig aufgelöst haben. Lasse die Lake kurz abkühlen.
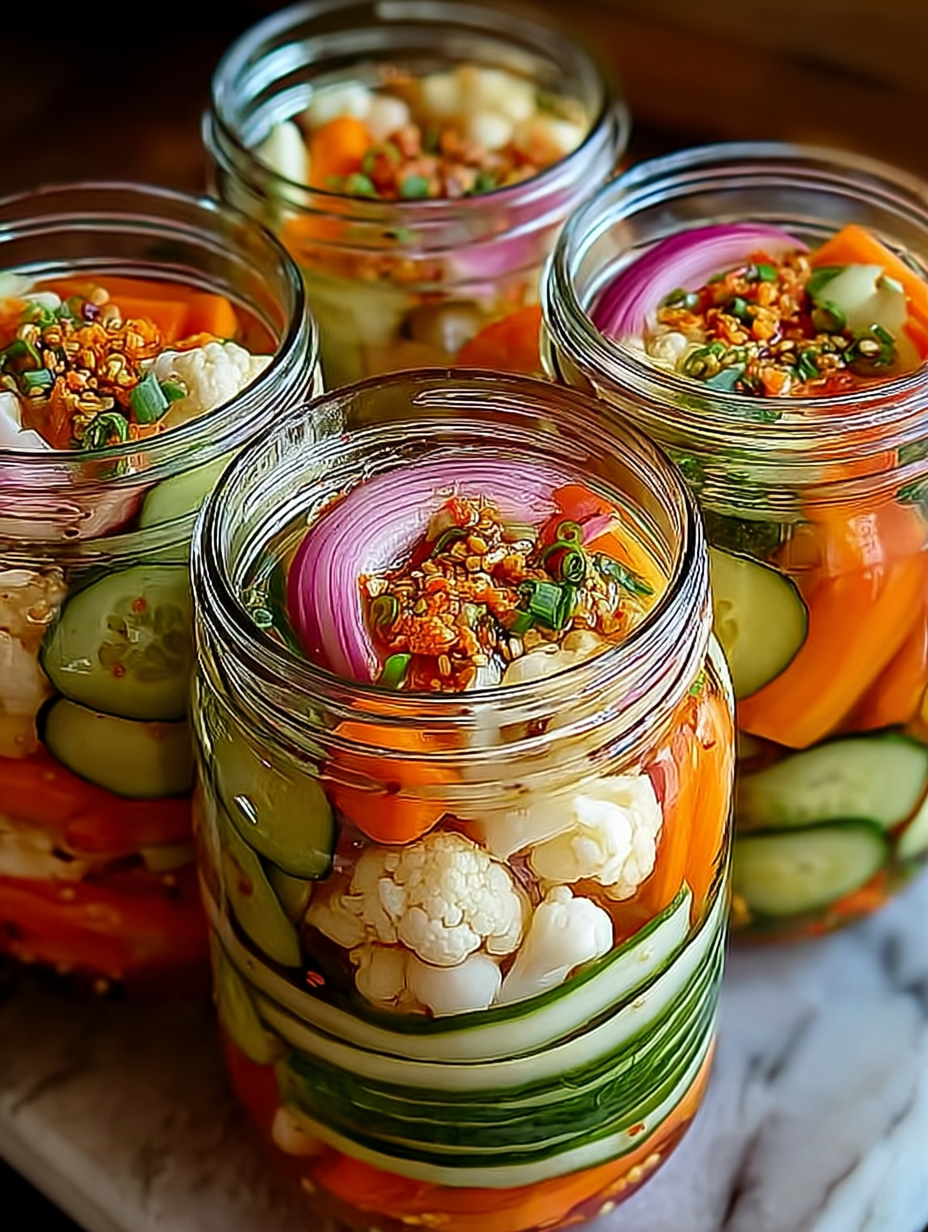
Step 3: Gemüse schichten
Schichte das geschnittene Gemüse zusammen mit dem gehackten Knoblauch und dem Dill in saubere Gläser. Achte darauf, dass die Gläser nicht zu voll werden, da das Gemüse noch etwas Platz zum Quellen benötigt.
Step 4: Mit Lake übergießen
Gieße die abgekühlte Lake über das Gemüse, sodass es vollständig bedeckt ist. Drücke das Gemüse gegebenenfalls mit einem Löffel etwas nach unten, damit keine Luftblasen entstehen.
Step 5: Ziehen lassen
Verschließe die Gläser gut und lasse das eingelegte Gemüse mindestens 24 Stunden im Kühlschrank ziehen. Je länger es zieht, desto intensiver wird der Geschmack.
Step 6: Genießen
Serviere das einfach eingelegte Gemüse aus dem Kühlschrank als Beilage zu Gegrilltem, als Snack zwischendurch oder als Zutat für Salate und Sandwiches. Es passt perfekt zu Fleisch, Fisch oder vegetarischen Gerichten.
Perfecting the Cooking Process
Begin by prepping all your vegetables. This ensures that once the brine is ready, you can quickly assemble everything. Pack the vegetables tightly into jars, then pour the cooled brine over them. This efficient sequence maximizes flavor absorption.
Add Your Touch
Feel free to experiment with different herbs and spices. Consider adding mustard seeds, coriander, or even a pinch of red pepper flakes for a kick. Don’t be afraid to swap out vegetables based on what’s in season or available.
Storing & Reheating
Store the sealed jars of **einfach eingelegtes Gemüse aus dem Kühlschrank** in the refrigerator. They will be ready to eat in about 24 hours and can last for several weeks. There is no need to reheat; enjoy them cold!
Here are some tips to master the art of pickling:
- Use a mandoline or a very sharp knife to ensure even slices, which helps with uniform pickling and a consistent texture in your **einfach eingelegtes Gemüse aus dem Kühlschrank**.
- Don’t overcook your vegetables if you decide to blanch them; a quick dip in boiling water is enough to soften them slightly and brighten their colors.
- Ensure your jars are completely clean and airtight to prevent spoilage and maintain the crispness of your **einfach eingelegtes Gemüse aus dem Kühlschrank**.
(Personal anecdote formated as paragraph subheading)
My grandma always said, “The best pickles are the ones you almost forget about!” She was right; letting them sit in the fridge for a week really intensifies the flavor.
The Charm of Homemade Pickles
Okay, folks, let’s talk pickles. Not just any pickles, though. We’re diving headfirst into the wonderful world of **einfach eingelegtes Gemüse aus dem Kühlschrank**. Now, I know what you might be thinking: “Pickling? Isn’t that, like, something my great-aunt Mildred used to do in a dimly lit cellar?” Well, maybe. But I’m here to tell you that pickling is back, baby! And it’s easier than binge-watching your favorite show.
Forget those sad, soggy specimens from the supermarket. We’re talking about crisp, vibrant, flavor-packed delights that will make your taste buds sing. And the best part? You can whip up a batch of this **einfach eingelegtes Gemüse aus dem Kühlschrank** with whatever veggies you have languishing in your crisper drawer. Seriously, it’s a fridge clean-out miracle!
Why This Recipe Rocks
So, why should you bother with this recipe? Because it’s foolproof! Even if you’ve never wielded a pickling spear (do those exist?), you can nail this. Plus, it’s incredibly versatile. Got cucumbers? Great! Carrots? Perfect! Radishes that are starting to look a little sad? They’re about to have a new lease on life as delicious, tangy snacks.
And let’s not forget the health benefits. Pickling can actually boost the nutritional value of your vegetables. Fermentation, while not always present in refrigerator pickles, can create probiotics, which are good for your gut. So you’re basically making a healthy and delicious snack. Win-win!
The Secret Weapon
: The Brine
The magic of **einfach eingelegtes Gemüse aus dem Kühlschrank** lies in the brine. This isn’t your grandma’s complicated, heavily spiced brine. We’re keeping it simple, fresh, and adaptable. Vinegar is the star of the show, acting as both a preservative and a flavor bomb. You can use white vinegar for a classic tang, apple cider vinegar for a hint of sweetness, or even rice vinegar for a more delicate flavor.
Then comes the sugar. Just a touch, to balance the acidity and enhance the natural sweetness of the vegetables. Don’t worry, we’re not making candy. It’s just enough to make the flavors pop. And finally, the spices! This is where you can really get creative. Garlic, peppercorns, mustard seeds, dill – the possibilities are endless!
Gather Your Veggie Troops
Alright, let’s talk vegetables. As I mentioned, this recipe is incredibly forgiving. You can use just about any firm vegetable you can find. Here are some of my favorites:
- Cucumbers: Obviously! Sliced thinly or cut into spears, they are a pickling classic.
- Carrots: Add a lovely sweetness and crunch. Cut them into coins, sticks, or even use a vegetable peeler to create ribbons.
- Radishes: Their peppery bite is toned down beautifully by the brine. Keep them whole if they’re small, or slice them into rounds.
- Bell Peppers: Red, yellow, or orange, they add a burst of color and sweetness. Cut them into strips or dice them.
- Green Beans: A surprisingly delicious addition! Snap them into bite-sized pieces.
- Onions: Red onions add a beautiful color and a pungent flavor. Slice them thinly.
- Cauliflower and Broccoli: Florets add a satisfying crunch. Blanch them briefly before pickling to soften them slightly.
Remember, the key is to use fresh, high-quality vegetables. No one wants to eat a soggy pickle!
A Word on Jars
You don’t need fancy pickling jars for this recipe. Clean glass jars with tight-fitting lids are perfect. Mason jars are ideal, but you can also reuse jars from pickles, olives, or even jam. Just make sure they’re thoroughly cleaned and sterilized to prevent any unwanted bacteria from crashing the party. You can sterilize the jars by boiling them in water for 10 minutes or running them through a hot cycle in your dishwasher.
The Brine-Making Bonanza
Okay, now for the fun part: making the brine! This is where your kitchen starts to smell amazing.
The Basic Brine Recipe
Here’s a basic brine recipe that you can adapt to your liking:
- 1 cup vinegar (white, apple cider, or rice)
- 1 cup water
- 2 tablespoons sugar
- 1 tablespoon salt
- Spices of your choice (garlic, peppercorns, mustard seeds, dill, etc.)
Instructions
1. Combine all the ingredients in a saucepan.
2. Bring to a boil over medium heat, stirring until the sugar and salt are dissolved.
3. Remove from heat and let cool completely.
That’s it! Seriously, it’s that easy.
Spice It Up!
Now, let’s talk spices. This is where you can really put your personal stamp on your **einfach eingelegtes Gemüse aus dem Kühlschrank**. Here are some ideas:
- Garlic: Adds a pungent, savory flavor. Smash a few cloves and throw them in the brine.
- Peppercorns: Black, white, or pink, they add a subtle warmth and spice.
- Mustard Seeds: Yellow or brown, they add a pop of flavor and a slightly bitter edge.
- Dill: Fresh or dried, it’s a classic pickling herb.
- Red Pepper Flakes: For a little kick!
- Bay Leaves: Add a subtle, earthy flavor.
- Ginger: Fresh or dried, it adds a warm, spicy note.
- Turmeric: Adds a beautiful golden color and a slightly earthy flavor.
Don’t be afraid to experiment! Try different combinations and see what you like best.
The Grand Assembly
Alright, you’ve got your vegetables, your jars, and your brine. It’s time to assemble your masterpiece!
Layering Like a Pro
1. Pack the vegetables tightly into the jars. You want to fill the jars as much as possible, but leave about ½ inch of headspace at the top.
2. Pour the cooled brine over the vegetables, making sure they are completely submerged.
3. Tap the jars gently on the counter to release any air bubbles.
4. Wipe the rims of the jars clean and seal them tightly with the lids.
The Waiting Game
Now comes the hardest part: waiting. The **einfach eingelegtes Gemüse aus dem Kühlschrank** need to sit in the refrigerator for at least 24 hours before you can eat them. This allows the flavors to meld and the vegetables to pickle properly. I know, it’s torture. But trust me, it’s worth it! The longer they sit, the more flavorful they become.
Enjoy Your Fridge-Pickled Treasures
Congratulations! You’ve made your own **einfach eingelegtes Gemüse aus dem Kühlschrank**. Now it’s time to enjoy the fruits (or vegetables!) of your labor. These pickles are delicious on their own as a snack, but they also make a fantastic addition to sandwiches, salads, cheese boards, and even cocktails.
Serving Suggestions
- Add them to a charcuterie board for a tangy counterpoint to rich cheeses and meats (turkey or chicken, of course!).
- Top your sandwiches and burgers with a few slices for extra flavor and crunch.
- Toss them into salads for a burst of freshness.
- Chop them up and add them to tuna or chicken salad.
- Use the brine to make a delicious vinaigrette.
Troubleshooting Tips
- If your pickles are too sour, add a little more sugar to the brine next time.
- If they’re not sour enough, add more vinegar.
- If they’re too salty, use less salt.
- If they’re not crisp enough, make sure you’re using fresh vegetables and that you’re not overcooking them if you choose to blanch them.
The most important thing is to have fun and experiment! Pickling is all about finding what you like best. So go ahead, get pickling! You might just surprise yourself with how easy and rewarding it is. And who knows, you might even become the next great-aunt Mildred of your family. But with better pickles, of course!
Conclusion for Einfach eingelegtes Gemüse aus dem Kühlschrank :
Also, worauf wartest du noch? Das Rezept für einfach eingelegtes Gemüse aus dem Kühlschrank ist kinderleicht und die Ergebnisse sind einfach umwerfend. Du sparst Geld, vermeidest unnötige Zusatzstoffe und hast immer einen leckeren, gesunden Snack parat. Ob als Beilage zum Grillen, als Topping für Salate oder einfach pur aus dem Glas – dein selbst eingelegtes Gemüse wird garantiert zum Hit. Also ran an die Gemüsekisten und losgelegt! Dein Kühlschrank wird es dir danken (und deine Geschmacksnerven auch)!
Print
Einfach eingelegtes Gemüse aus dem Kühlschrank
Delicious einfach eingelegtes gemüse aus dem kühlschrank recipe with detailed instructions and nutritional information.
- Total Time: 35 minutes
- Yield: 4 servings 1x
Ingredients
- 1 Gurke, mittelgroß
- 1 rote Paprika
- 1 Zwiebel, rot
- 2 Karotten
- 2 Knoblauchzehen
- 125 ml Essig (z.B. Weißweinessig oder Apfelessig)
- 125 ml Wasser
- 2 EL Zucker
- 1 TL Salz
- ½ TL Senfsaat
- ½ TL Pfefferkörner
- Lorbeerblatt (optional)
Instructions
- Step 1: Gemüse vorbereiten: Gurke, Paprika und Karotten waschen und in dünne Scheiben oder Stifte schneiden. Zwiebel schälen und in dünne Ringe schneiden. Knoblauch schälen und fein hacken oder in Scheiben schneiden.
- Step 2: Sud vorbereiten: Essig, Wasser, Zucker, Salz, Senfsaat, Pfefferkörner und Lorbeerblatt (falls verwendet) in einem Topf verrühren.
- Step 3: Sud aufkochen: Den Sud unter Rühren zum Kochen bringen, bis sich Zucker und Salz vollständig aufgelöst haben. Anschließend vom Herd nehmen und etwas abkühlen lassen.
- Step 4: Gemüse einlegen: Das vorbereitete Gemüse in ein sauberes Glas oder eine Dose schichten.
- Step 5: Sud über das Gemüse gießen: Den abgekühlten Sud über das Gemüse gießen, sodass alles vollständig bedeckt ist. Gegebenenfalls etwas Wasser nachgießen.
- Step 6: Im Kühlschrank ziehen lassen: Das Glas oder die Dose verschließen und mindestens 2 Stunden (oder besser über Nacht) im Kühlschrank ziehen lassen, damit das Gemüse den Geschmack annimmt. Das eingelegte Gemüse ist im Kühlschrank mehrere Tage haltbar.
Notes
- Im Kühlschrank hält sich das eingelegte Gemüse gut eine Woche; verwende ein sauberes Glas, um die Haltbarkeit zu verlängern.
- Dieses eingelegte Gemüse ist am besten kalt; ein Erwärmen ist nicht nötig, da es seine Frische verlieren würde.
- Serviere das eingelegte Gemüse als erfrischende Beilage zu Gegrilltem, Salaten oder als Topping für Sandwiches.
- Für einen intensiveren Geschmack, füge dem Sud eine Prise Chiliflocken hinzu oder experimentiere mit verschiedenen Essigsorten.
- Prep Time: 15 minutes
- Cook Time: 20 minutes
- Method: Stovetop
- Cuisine: American
FAQs :
Warum sollte ich eingelegtes Gemüse selber machen?
Weil es Spaß macht, lecker ist und du genau weißt, was drin ist! Stell dir vor, du öffnest deinen Kühlschrank und findest nicht nur fade Gurken, sondern ein farbenfrohes Potpourri aus knackigem Gemüse, eingelegt in einer aromatischen Marinade. Kein Vergleich zu den traurigen, essigsaueren Fertigprodukten aus dem Supermarkt. Außerdem kannst du mit deinen Lieblingsgewürzen experimentieren und so dein ganz persönliches Geschmacksfeuerwerk kreieren. Und ganz ehrlich, wer kann schon einem selbstgemachten Snack widerstehen, der auch noch gesund ist? Probiere es aus und werde zum König oder zur Königin des Kühlschranks!
Wie lange hält sich selbst eingelegtes Gemüse?
Geduld, junger Padawan! Im Kühlschrank hält sich dein eingelegtes Gemüse in der Regel etwa 2-3 Wochen. Wichtig ist, dass du es in einem sauberen, luftdichten Behälter aufbewahrst und immer darauf achtest, dass das Gemüse vollständig mit der Flüssigkeit bedeckt ist. Wenn du Anzeichen von Schimmel oder einem unangenehmen Geruch feststellst, ist es besser, das Gemüse zu entsorgen. Aber mal ehrlich, so lecker wie das ist, wird es vermutlich eh nicht so lange überleben. Wetten, du hast es schneller aufgegessen, als du “Essiggurke” sagen kannst?
Welches Gemüse eignet sich am besten zum Einlegen?
Die Frage ist eher: Welches Gemüse eignet sich NICHT zum Einlegen? Fast alles, was knackig und bissfest ist, kann in ein saures Paradies verwandelt werden. Gurken sind natürlich der Klassiker, aber auch Karotten, Zwiebeln, Paprika, Blumenkohl, grüne Bohnen, Radieschen und sogar Zucchini eignen sich hervorragend. Sei kreativ und probiere verschiedene Kombinationen aus! Denk daran, dass das Gemüse frisch und von guter Qualität sein sollte. Und wenn du es besonders bunt magst, wähle verschiedene Farben für deinen Gemüsemix – das Auge isst ja schließlich mit!
Kann ich auch andere Gewürze verwenden?
Aber hallo! Das ist ja das Schöne am Selbermachen: Du bist der Chefkoch deiner eigenen Einlegeküche! Experimentiere mit verschiedenen Gewürzen und Kräutern, um deinen ganz persönlichen Geschmack zu treffen. Senfkörner, Pfefferkörner, Chili, Knoblauch, Lorbeerblätter, Dill, Thymian, Rosmarin – der Fantasie sind keine Grenzen gesetzt. Trau dich, Neues auszuprobieren! Vielleicht entdeckst du ja deine ganz eigene Geheimzutat, die dein eingelegtes Gemüse aus dem Kühlschrank unvergesslich macht. Und wer weiß, vielleicht wirst du damit sogar berühmt!


Leave a Comment